
how to create a wordpress website on hostgator 2018

Nearly every week, I receive an email from a reader asking about how I gathered the motivation to start and maintain a blog (questions related on how to start a WordPress blog on HostGator as well). The very first thing you need to do is to START the blog you want. You won't know if you like blogging or if you hate it unless you actually start one.
Personally, I didn't know if I would like blogging. I threw myself out there and before I knew it, I was addicted to it. I love blogging and everything that goes along with it.
So, if you're looking to start a blog, today I have a step-by-step post and HostGator review that will show you how to easily start your own blog on HostGator.
When starting a WordPress blog, choosing HostGator for your web hosting plan is a good idea. HostGator is one of the top web hosting companies because of its affordability and how easy they make it to start a WordPress blog.
May be you are still debating whether or not you want to switch from Blogger to WordPress . Yes, you definitely should switch. I receive this question all the time and my answer is always the same. Switch to WordPress! I used to be on Blogger and I still regret the year I spent on it.
Here are reasons for why you might want to choose HostGator for your WordPress blog:
- HostGator is easy to use. I have created three blogs through HostGator with no problem whatsoever.
- HostGator makes it very easy to create a WordPress blog with just a few simple clicks.
- HostGator web hosting offers technical support and a 99.9% uptime guarantee.
- HostGator offers cheap web hosting.
- HostGator has a 45-Day money back guarantee.
- You will be self-hosted when you purchase a web hosting plan through HostGator. If you want to monetize your blog, then you will want to be self-hosted.
Below are my step by step instructions on how to start a WordPress blog on HostGator. If you scroll down to the bottom I also have a HostGator coupon code for 65% off that everyone can use just for reading this HostGator review.
To start the process, you will first need to head on over to HostGator to do any of this. There are many web hosting companies out there, but HostGator is one of the best blog hosting companies. There is a reason why many bloggers choose HostGator for their web hosting needs.
I have some affiliate links throughout this post, and if you could use it that would be great (along with a HostGator coupon code at the end). If you plan on starting a blog on HostGator, continue below:
Register your domain name is the first step in learning how to start a WordPress blog on HostGator.
The very first thing you will need to do when starting a WordPress blog on HostGator is to think about what you want your domain name to be.
Most people buy their domain name through GoDaddy and it's what I always do. So, you want to register your domain through GoDaddy and then use HostGator for your hosting (more steps below).
Or, you can just buy your domain directly from HostGator. There are positives and negatives of this, with the main thing being that you usually want to keep your domain and hosting separate so I usually recommend that you buy your domain through Go Daddy.

Select a plan with HostGator.
HostGator web hosting plans are CHEAP. Plans start at just $3.95 per month. If you enter HostGator coupon code “FAMASA24” when checking out, then you will save 65% as well.
Or If You Want to Test You Can Use One Cent Coupon For First Month
With the HostGator Order Wizard, you will register your new domain or enter the domain that you already own. You will then confirm your package type and billing cycle. If you have just one blog, then the cheaper Hatchling package is probably perfect for you (you can always change your HostGator blog hosting plan later). You will then choose your username and security pin. Next comes your billing information.
Keep in mind that you save more money if you choose a longer plan. I usually recommend one year or longer, and it seems like many people buy three years.
Connect your domain and your hosting.
If you buy your domain through Go Daddy, then you will need to connect your domain to your web hosting account. Go Daddy has a full support page for setting nameservers for your domain names. Don't let the instructions scare you, they are actually very easy.
How to modify your DNS Nameservers when you are using Go Daddy for your domain and HostGator for your hosting:
- Log in to the GoDaddy.com Account Manager.
- Next to Domains, click Launch.
- Select the domain name(s) you want to modify.
- From the Nameservers menu, select Set Nameservers.
- Under Setup type, select Custom.
- Select Add Nameservers.
- Enter the two nameservers your hosting provider gave you. For HostGator, you will find this in your Control Panel on the left hand side. It will look something like “ns1234.hostgator.com”
For further help, check out HostGator's help page on this subject.
Set up your blog on HostGator.
Now, once you set up your account, you will have to check your e-mail. You should receive an e-mail about your account information so that you can login. You will then click on the Control Panel Link you were given. This is your “cPanel.”
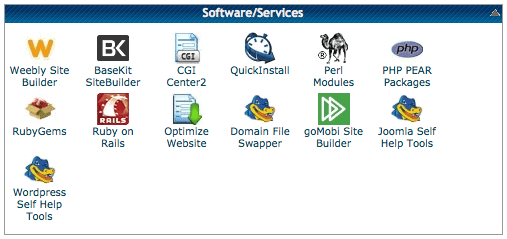
- When in your control Panel on HostGator, scroll down to “Software/Services” and click on “Quick Install.” QuickInstall is where you will install WordPress. And, it's free!
- After you click on Quick Install, on the left hand side you will find “WordPress.” Click on it.
- Click “Continue.”
- Here you will click on the domain that you want to install WordPress on. You will want to enter your admin email, blog title, admin user, first name and last name.
- Then click on “Install Now.” On the next page you will see a message. Make sure you save your username, password, and link to your admin area.
And you're done. Sort of.
WOOHOO! You now have started a WordPress blog on HostGator. You will have to work on the design and producing high quality content, of course. Good luck!
If you are looking into the actual design of your blog, Genesis seems to always be very popular. Genesis is used on my blog, and I highly recommend it. I can't believe I waited so long to switch to Genesis and I don't think I could ever switch to anything else.
If you found this post helpful, please click on any of my HostGator affiliate links within this HostGator review. If you enter HostGator coupon code “FAMASA24” then you will save an additional 65% as well by using this Hostgator coupon code.
